The growth of iOS users in the world has been tremendous and so has the influence of iOS Developers. I am not just referring to iOS as iOS , but encompassing iOS, TvOS, WatchOS and MacOS developers as well. Macs are being widely used as development tools since they support both XCode for iOS Development and Android Studio for Android app development.
Many people would like to start up companies which are into Mobile App Development. However its basic to know that you need to purchase an Apple Developer Account in order to get benefits of Apple Developer Program. Unlike the Google Play Developer console, which comes at a one - time fee of USD 25, which is bare minimum. Apart from that the share of in-app purchases has a revenue sharing model which I will talk about in another article.

Please follow the steps below to purchase an Apple Developer Account. Its fairly simple and straight forward.


Many people would like to start up companies which are into Mobile App Development. However its basic to know that you need to purchase an Apple Developer Account in order to get benefits of Apple Developer Program. Unlike the Google Play Developer console, which comes at a one - time fee of USD 25, which is bare minimum. Apart from that the share of in-app purchases has a revenue sharing model which I will talk about in another article.
Please follow the steps below to purchase an Apple Developer Account. Its fairly simple and straight forward.
iOS Developer Account Step by Step Guide
Overview
The iOS Developer Account is required to build/submit apps on the iTunes Store. For more information about why we require an iOS Developer Account from you, please read about the requirements here.Creating your iOS Developer Account through Apple
Follow these steps to sign up for an iOS Developer Account with Apple:
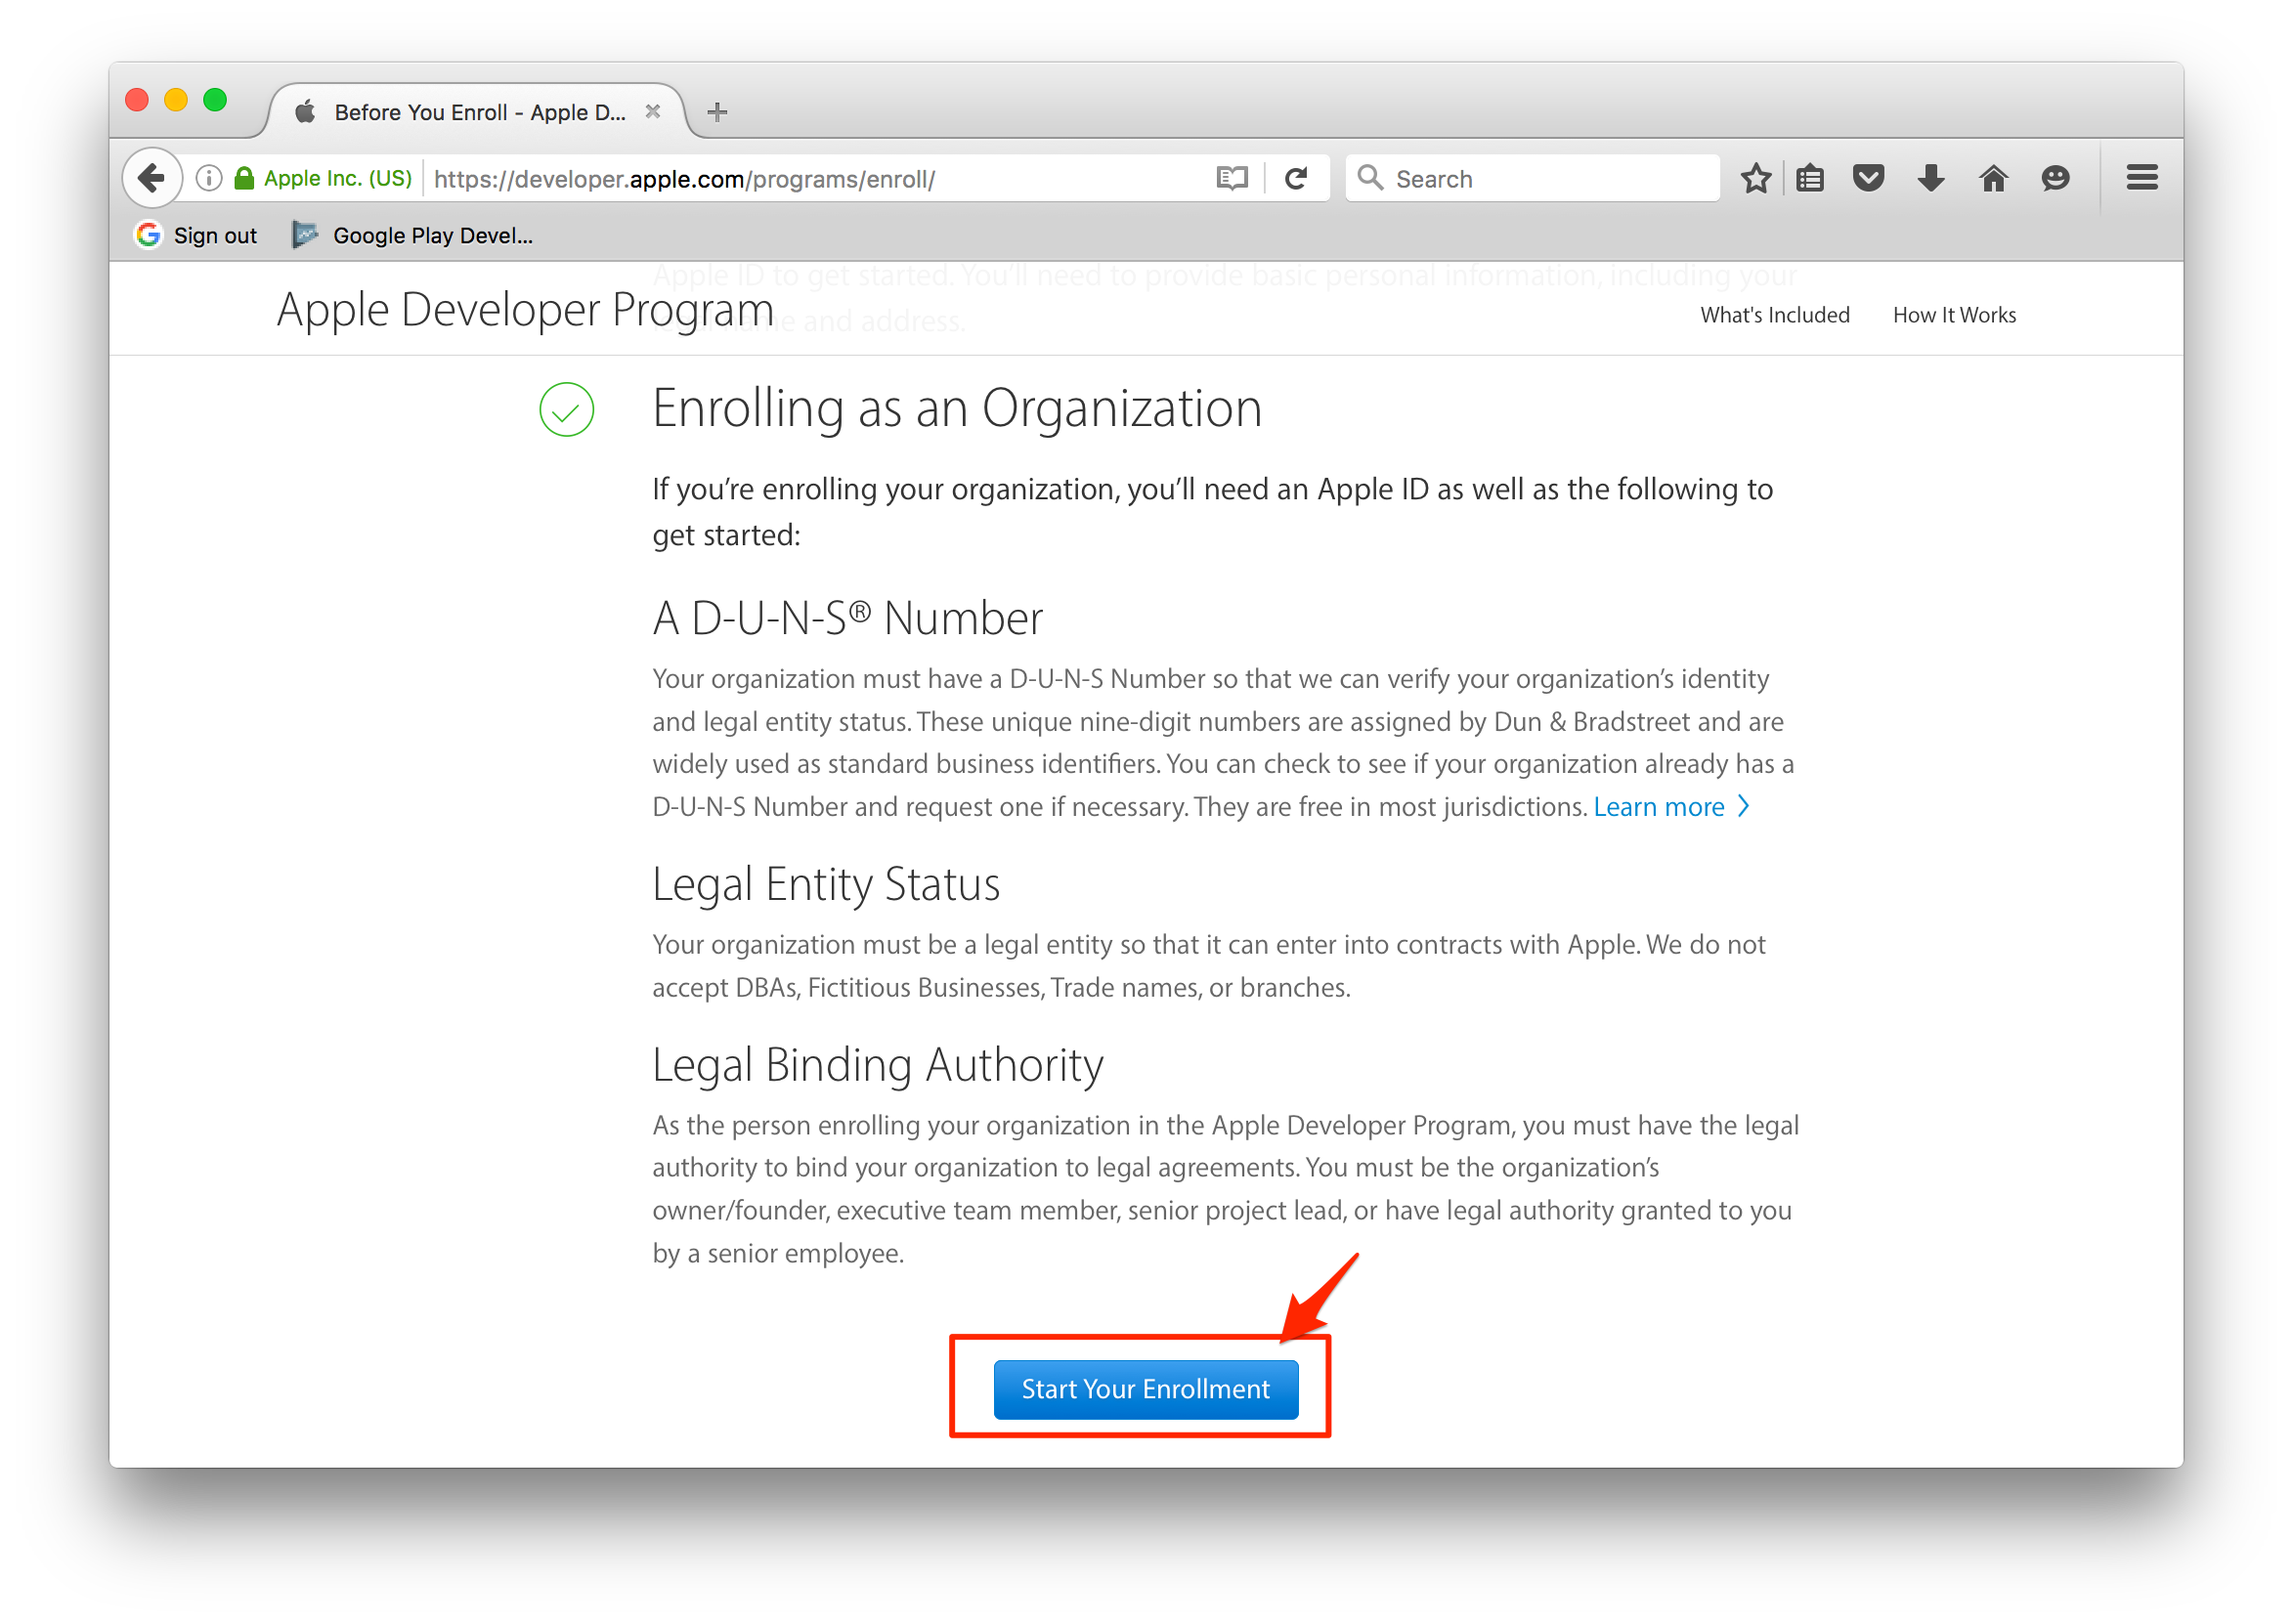
1. Go to: https://developer.apple.
2. Select ‘Start Your Enrollment'
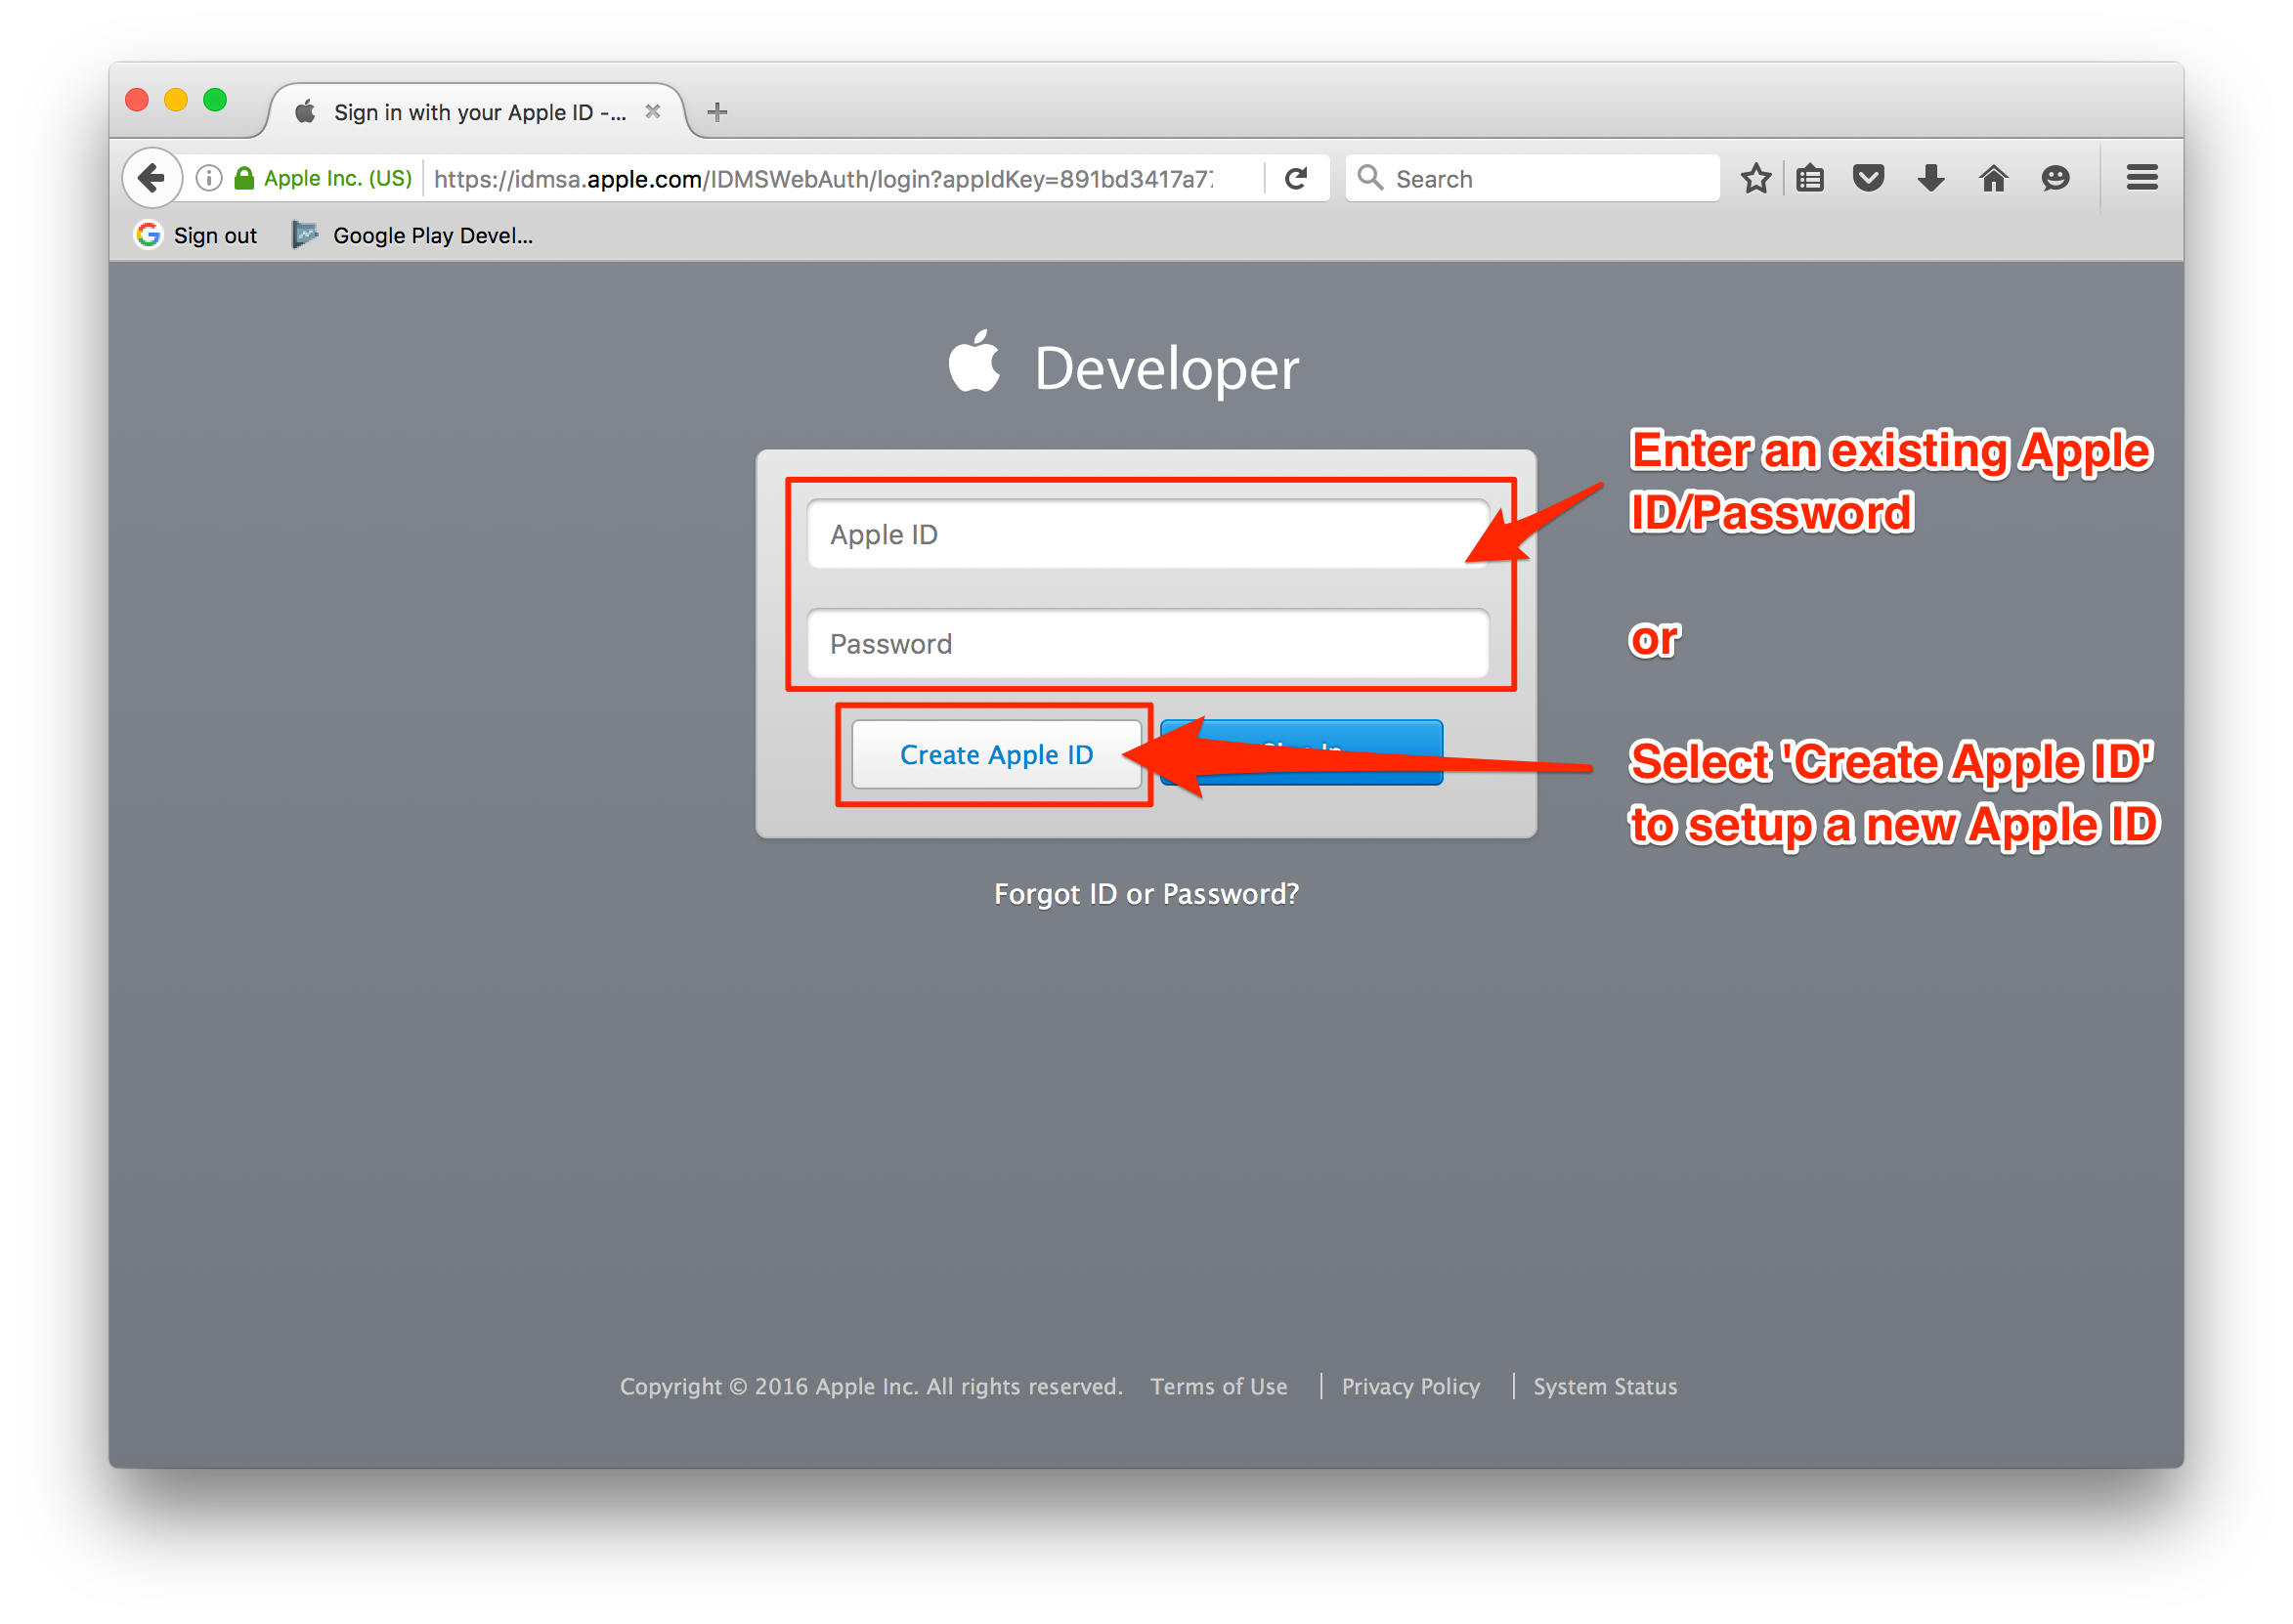
3. Sign in using an existing Apple ID or click ‘Create Apple ID’ to create a new Apple ID
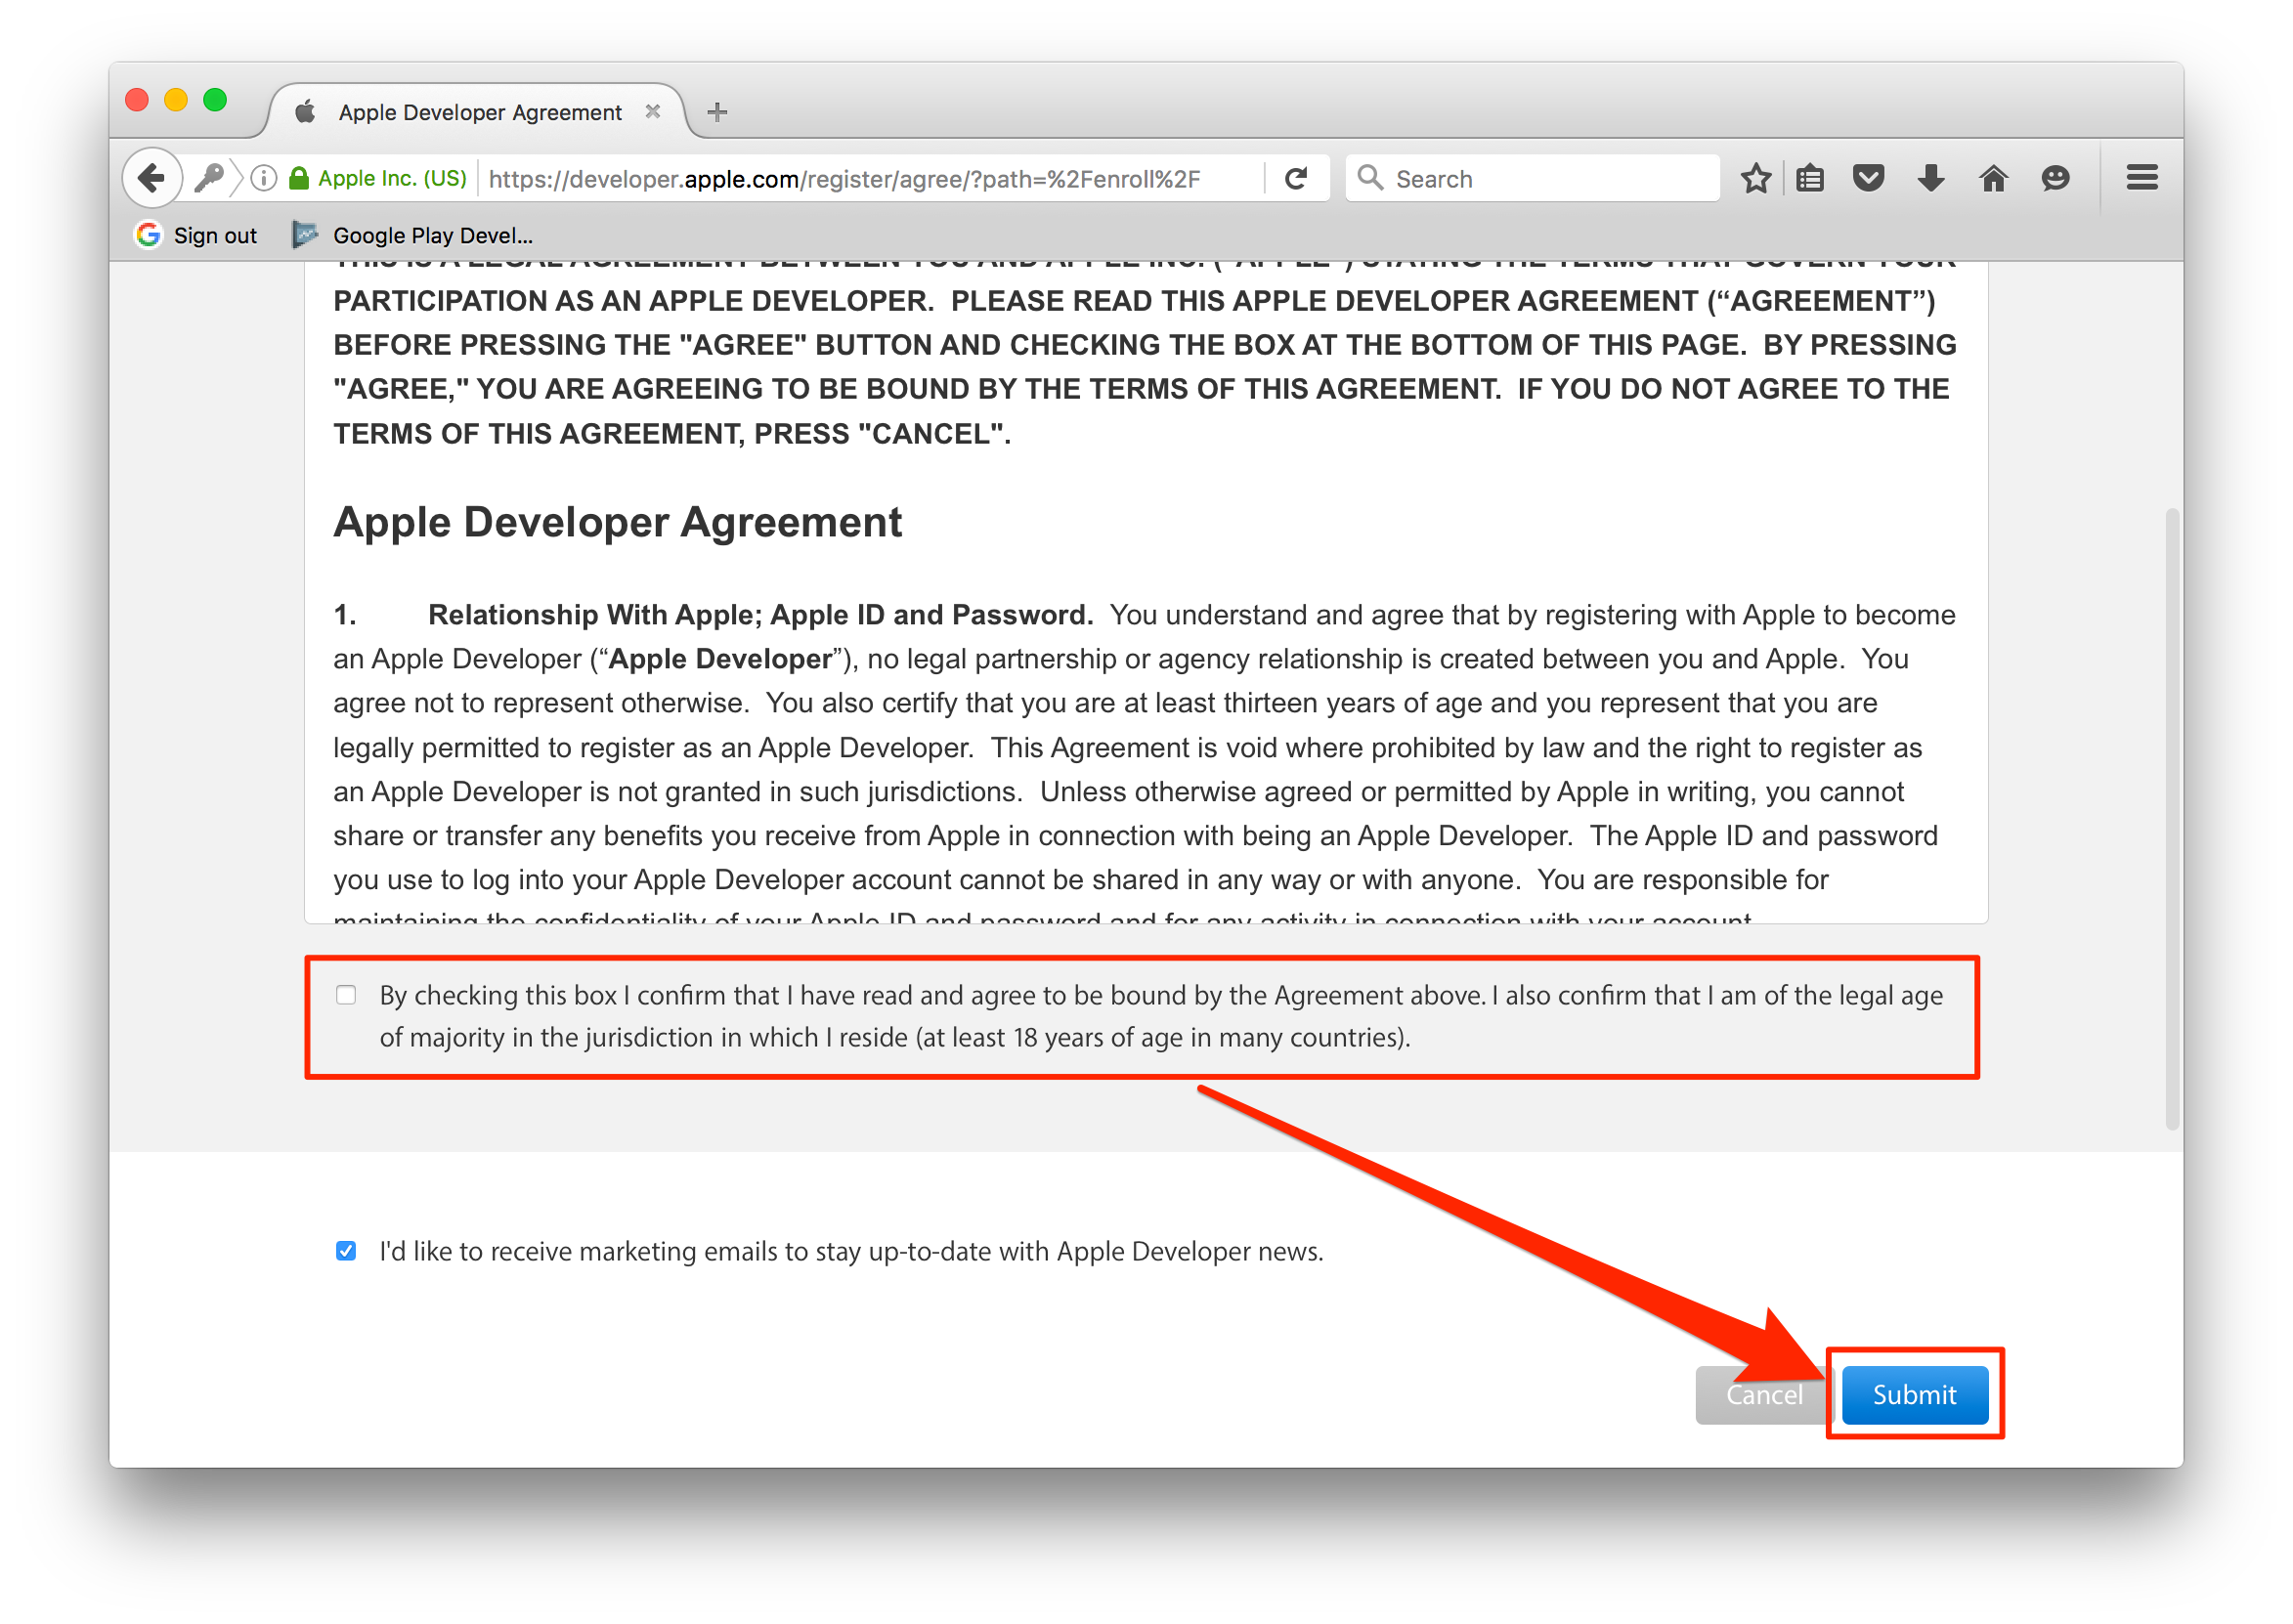
4. Read the Apple Developer Agreement then check the ‘By Checking this box I confirm that I have read and agree...’ box and click the ‘Submit’ button
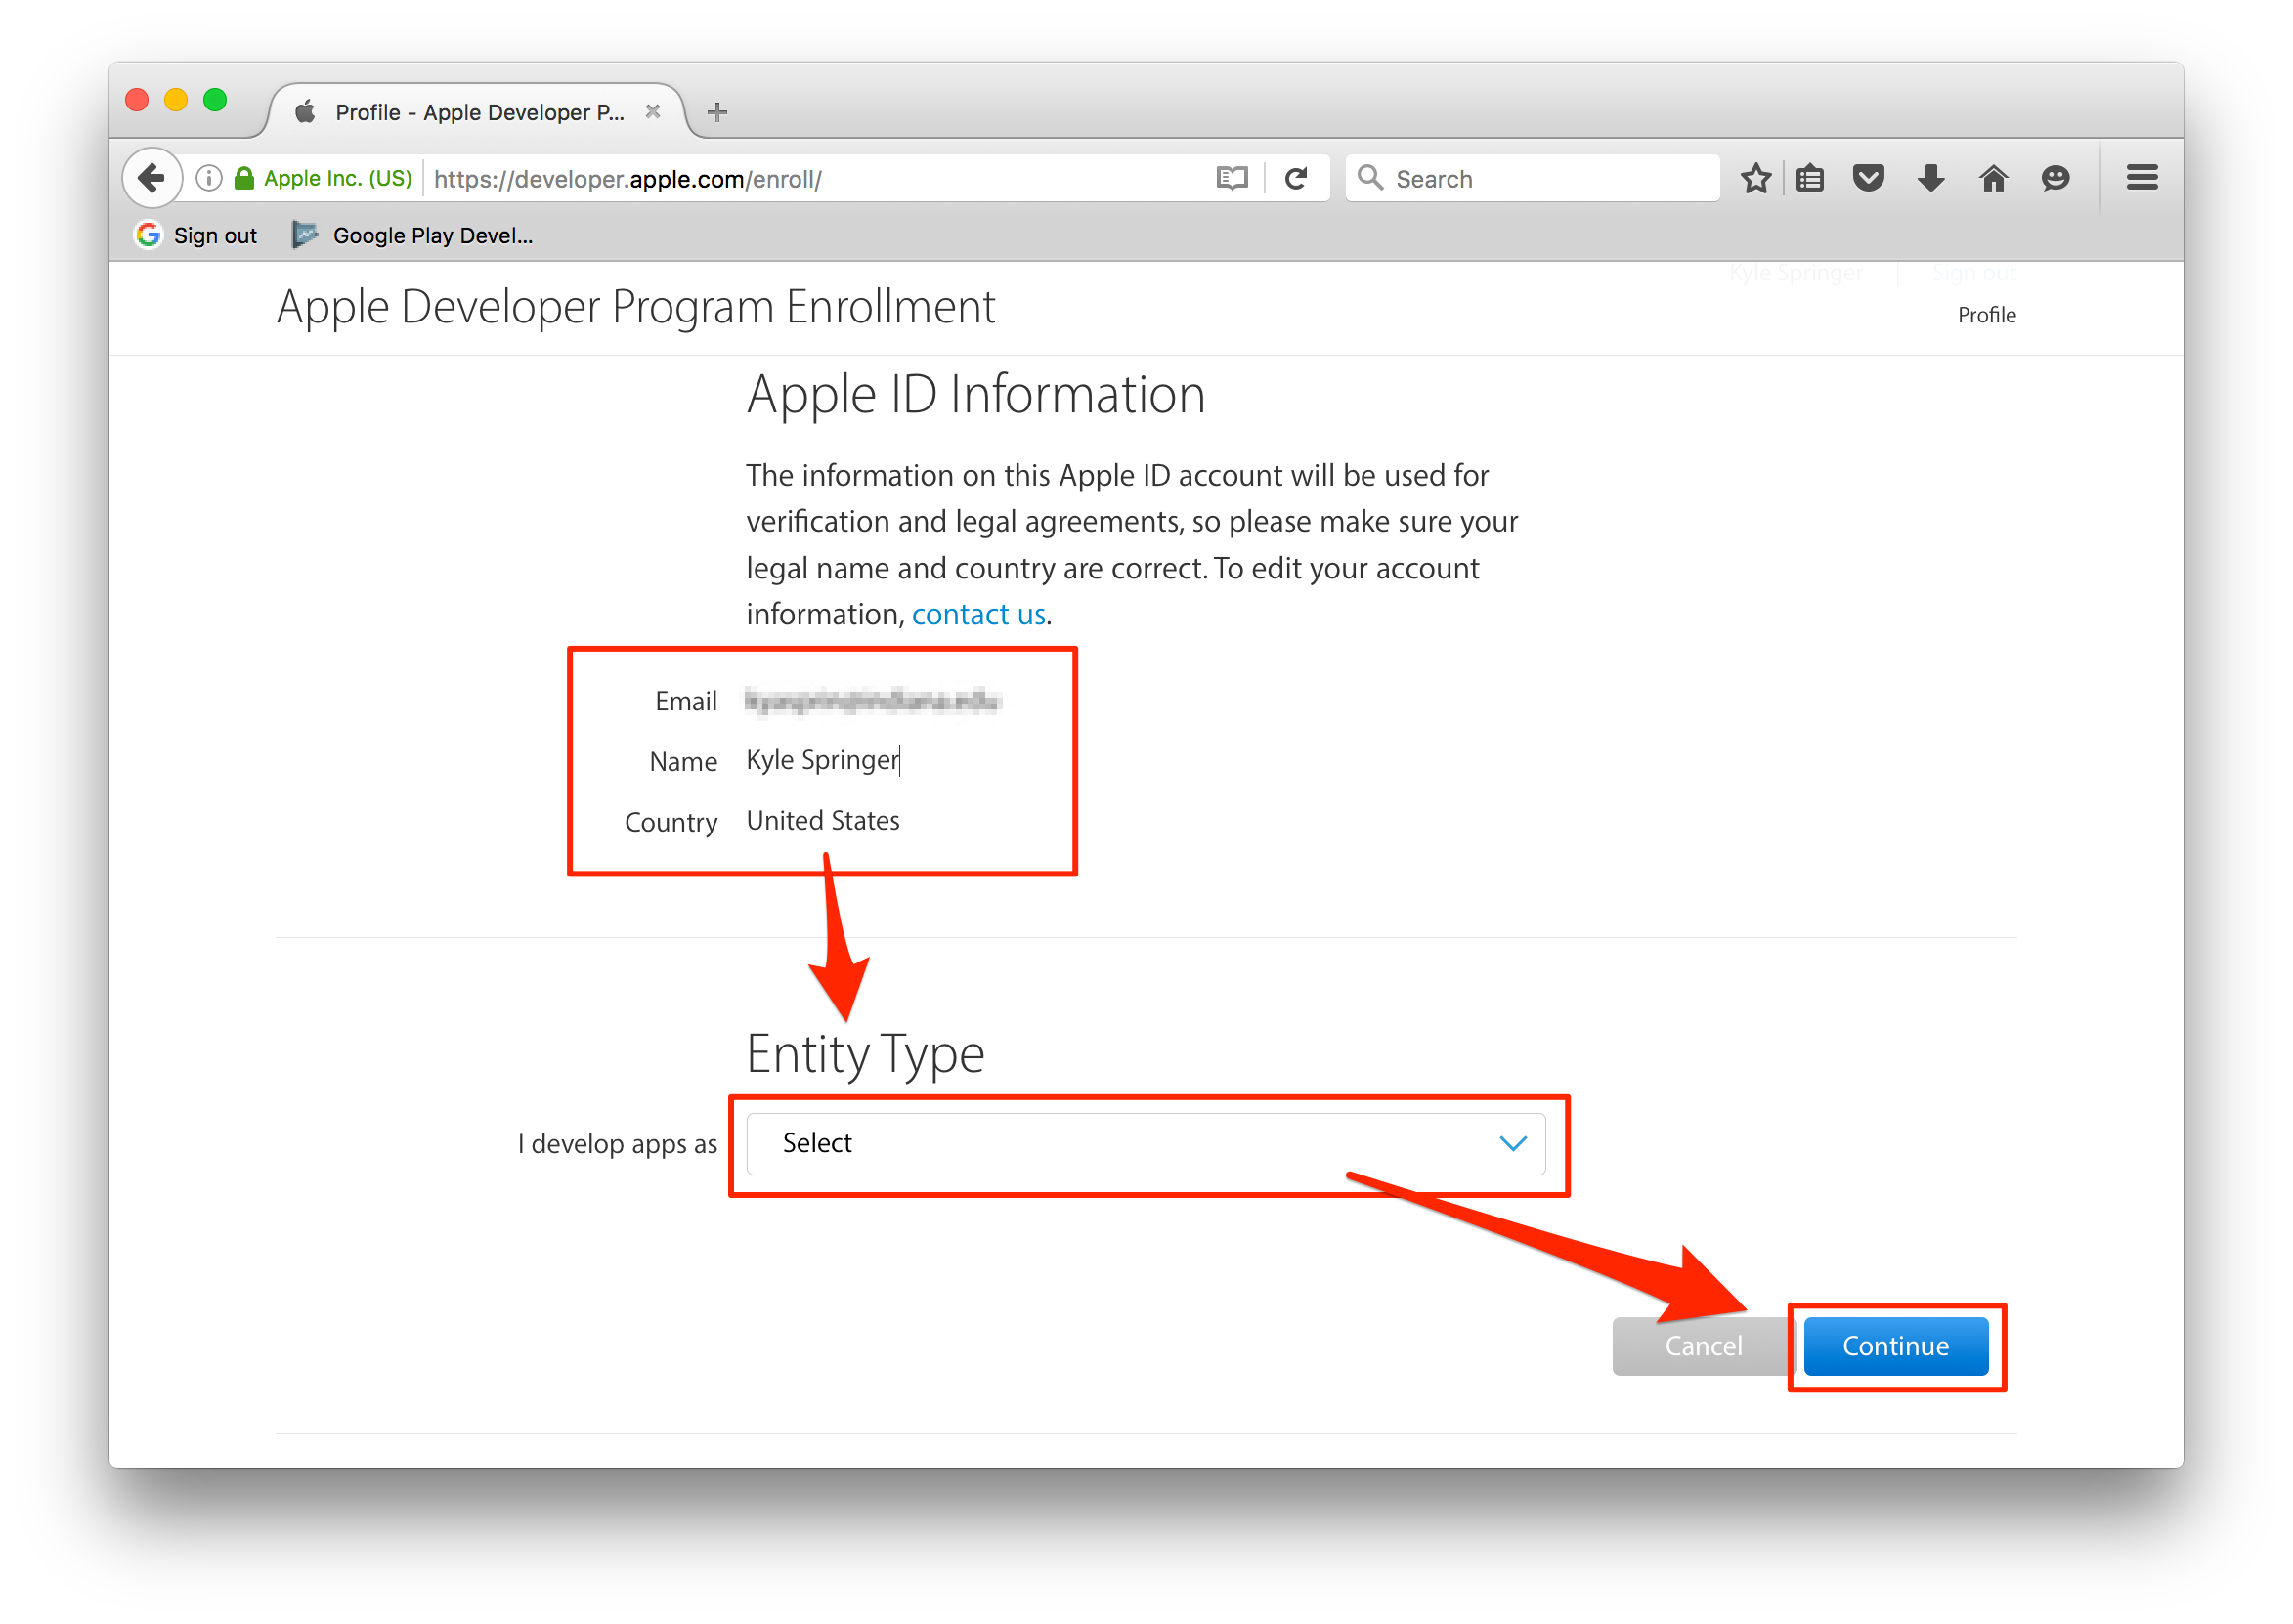
5. Confirm that your email address, name, and Country location is correct, then select one of the options from the Entity Type dropdown. The Developer name listed on the iTunes App Store is based on the type of account selected from the options below. Apps published to Individual Developer Accounts will display the name listed on the iOS Developer Account. Apps published to Company/Organization Developer Accounts will display the Company Name entered within the iOS Developer Account.
- Individual/Sole Proprietor/Single Person Business: Individuals or companies without an officially recognized business (company without a Dun and Bradstreet number). This account only allows for a single primary login to be created to the iOS Developer Account
- Company/Organization: Legally
recognized Companies with a Dun and Bradstreet number can select this option. This will allow multiple user logins to be created and managed with varying permissions capabilities for each login. See here to check if your company is a legal recognized company with a Dun and Bradstreet number. - A D-U-N-S number is a unique 9 digit identification number for each physical location of your Business. If you know what is CIBIL in India, it is kind of something like that, but not completely. Follow this link to get a D-U-N-S number. This link is for Apple Developers.
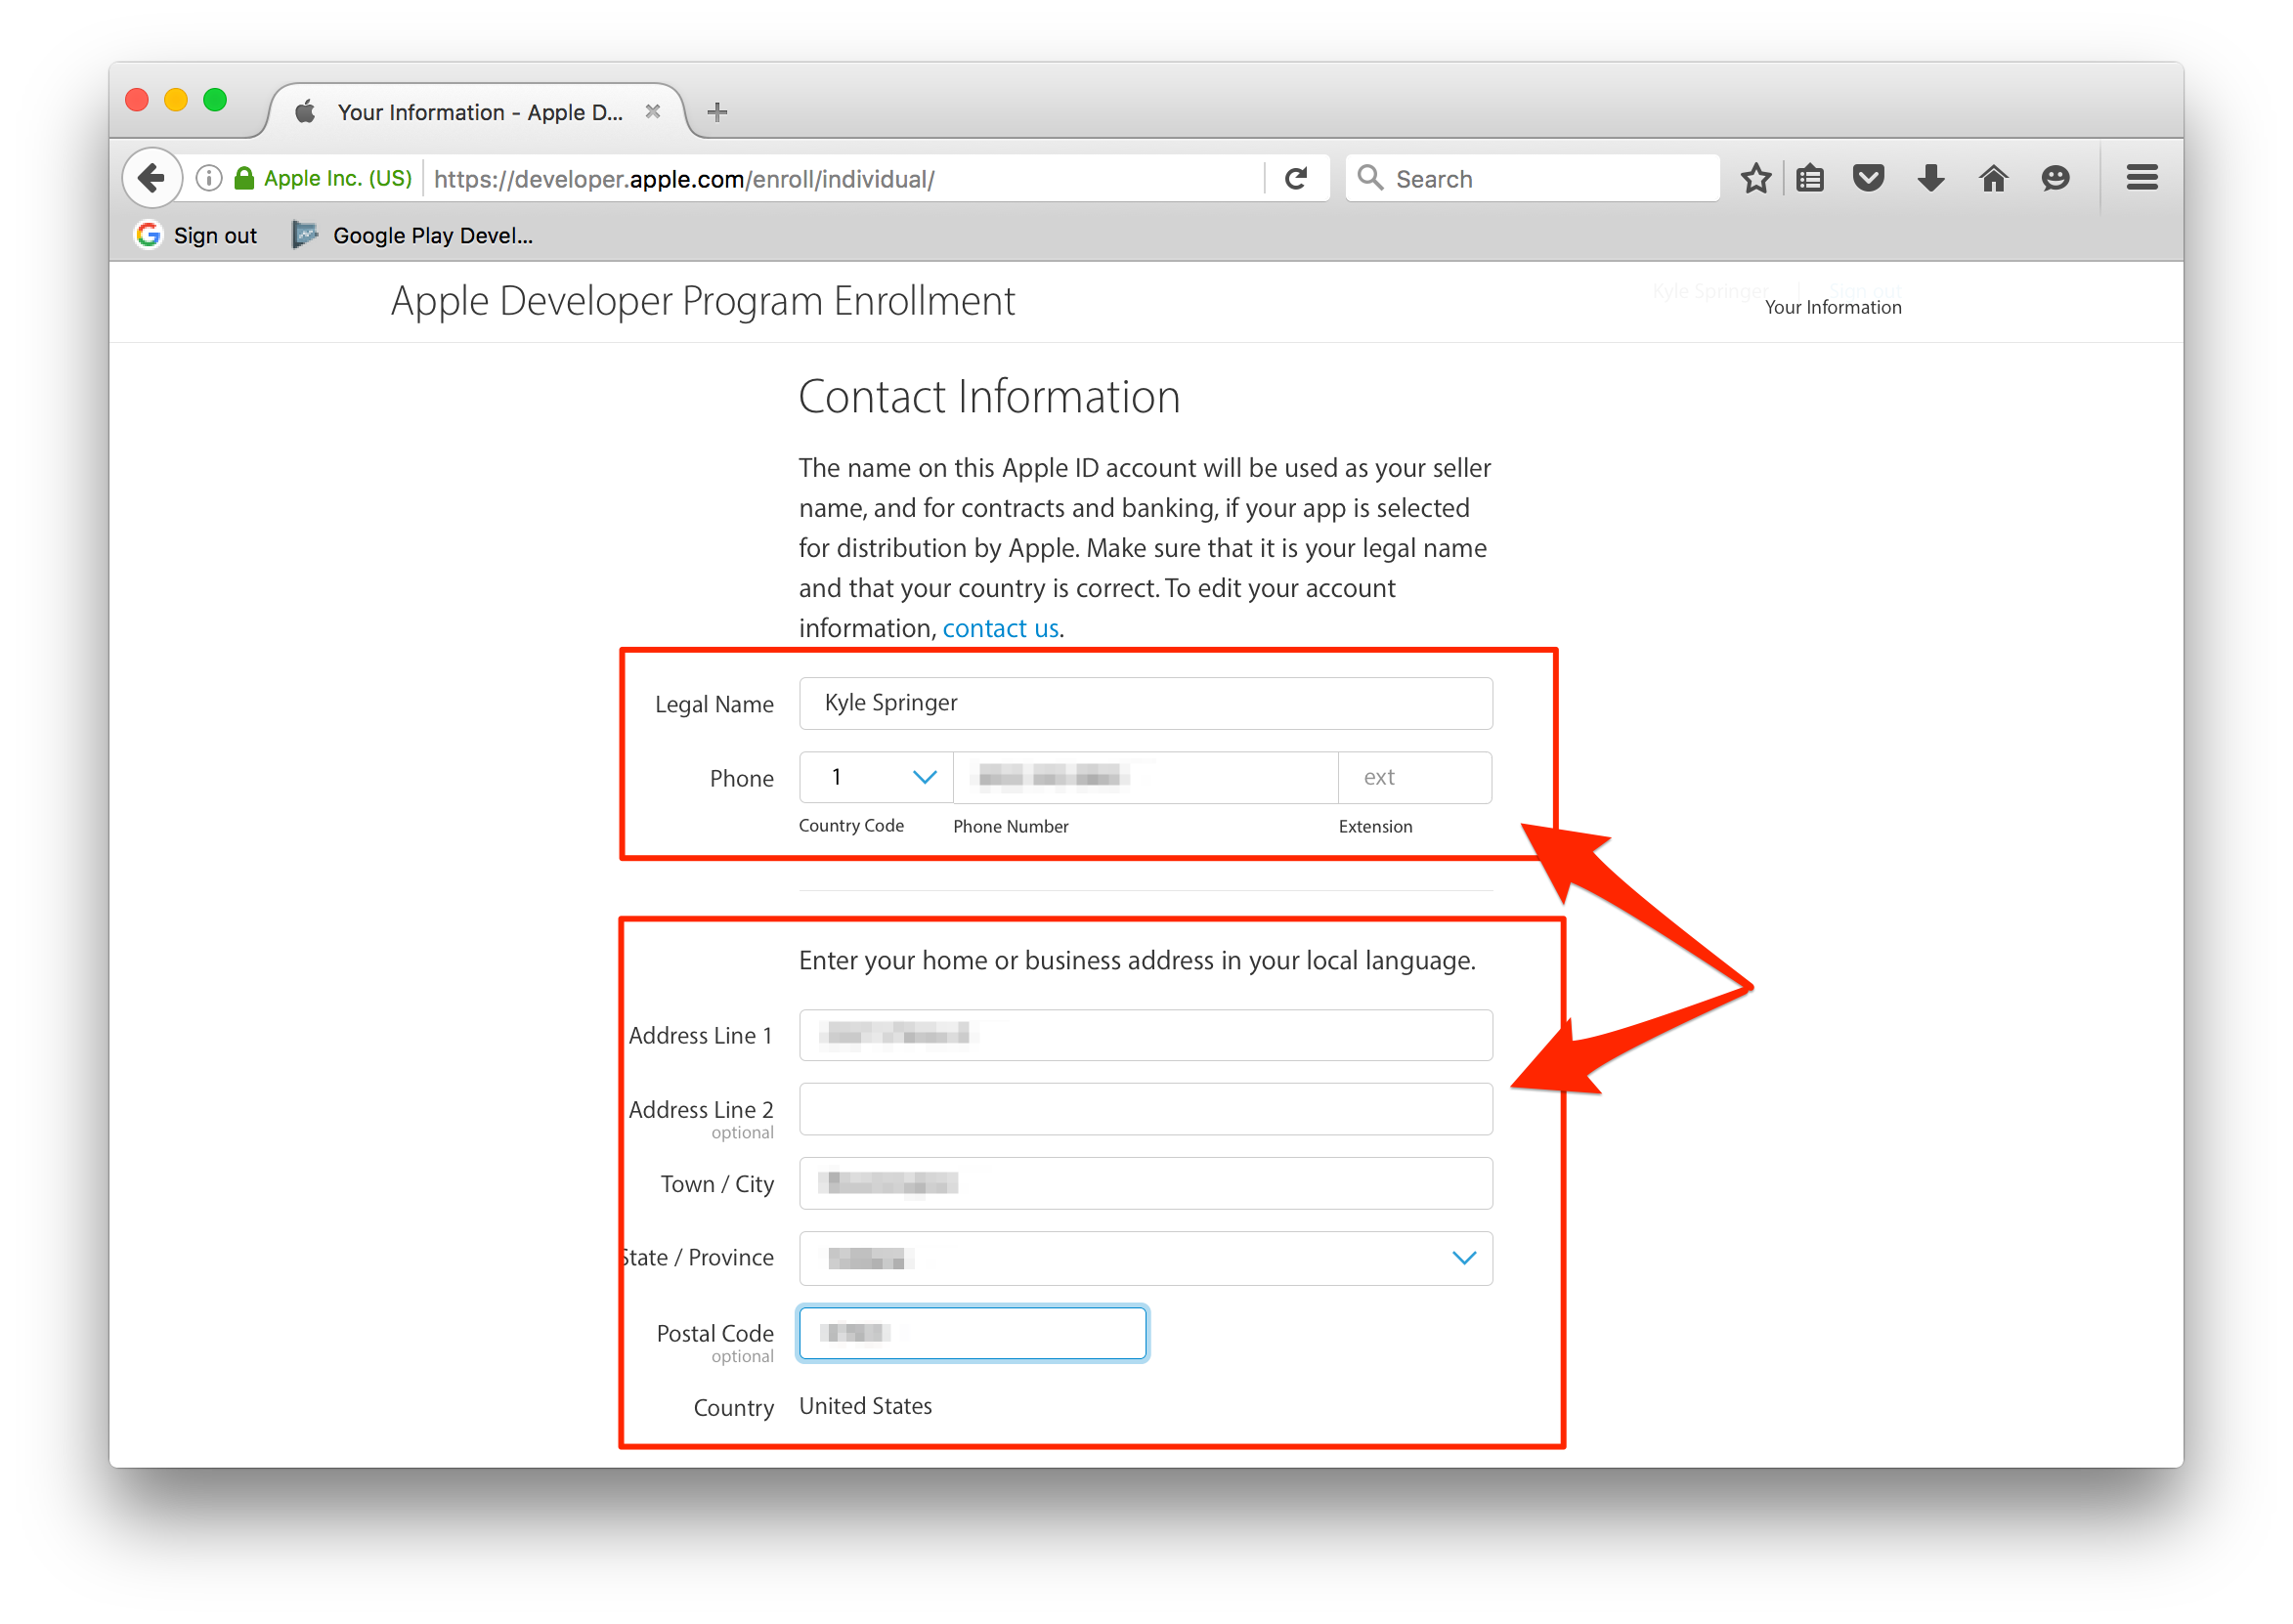
6. Fill in the Contact Information for your iOS Developer Account
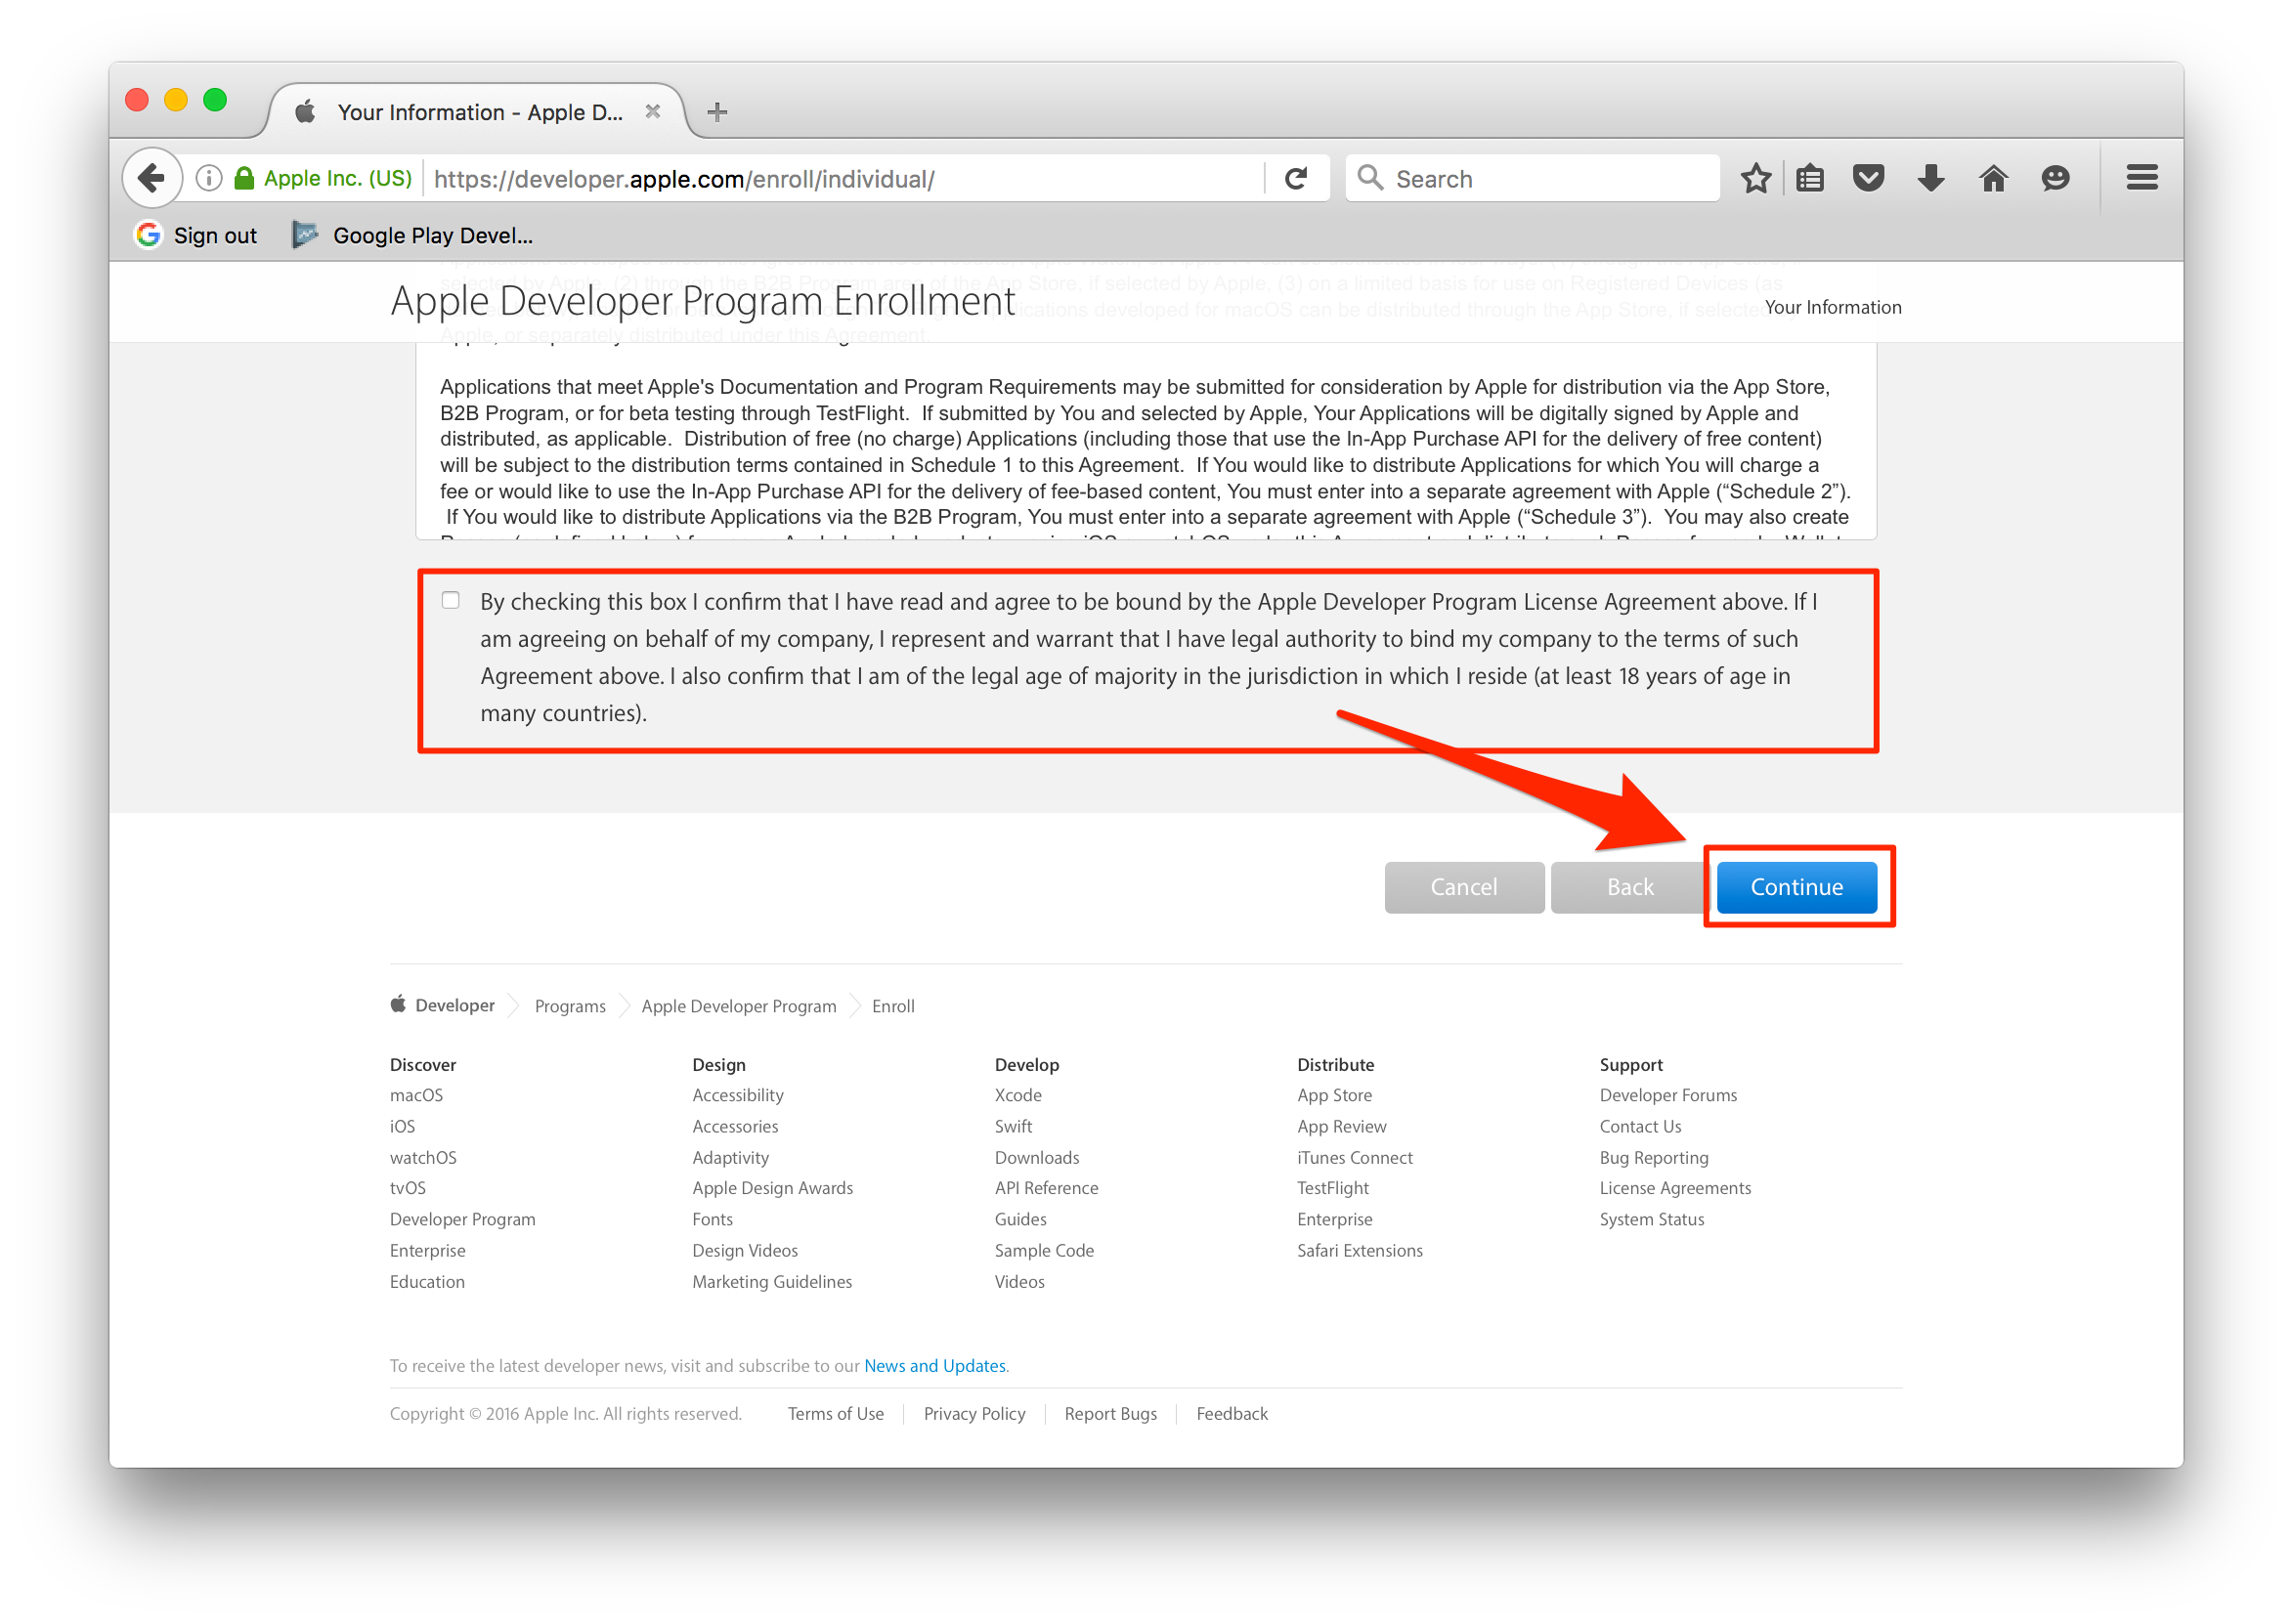
7. At the bottom of the screen, read the Apple Developer Program License Agreement, check the ‘By checking this box I confirm that I have read and agree...’, box, then click ‘Continue'
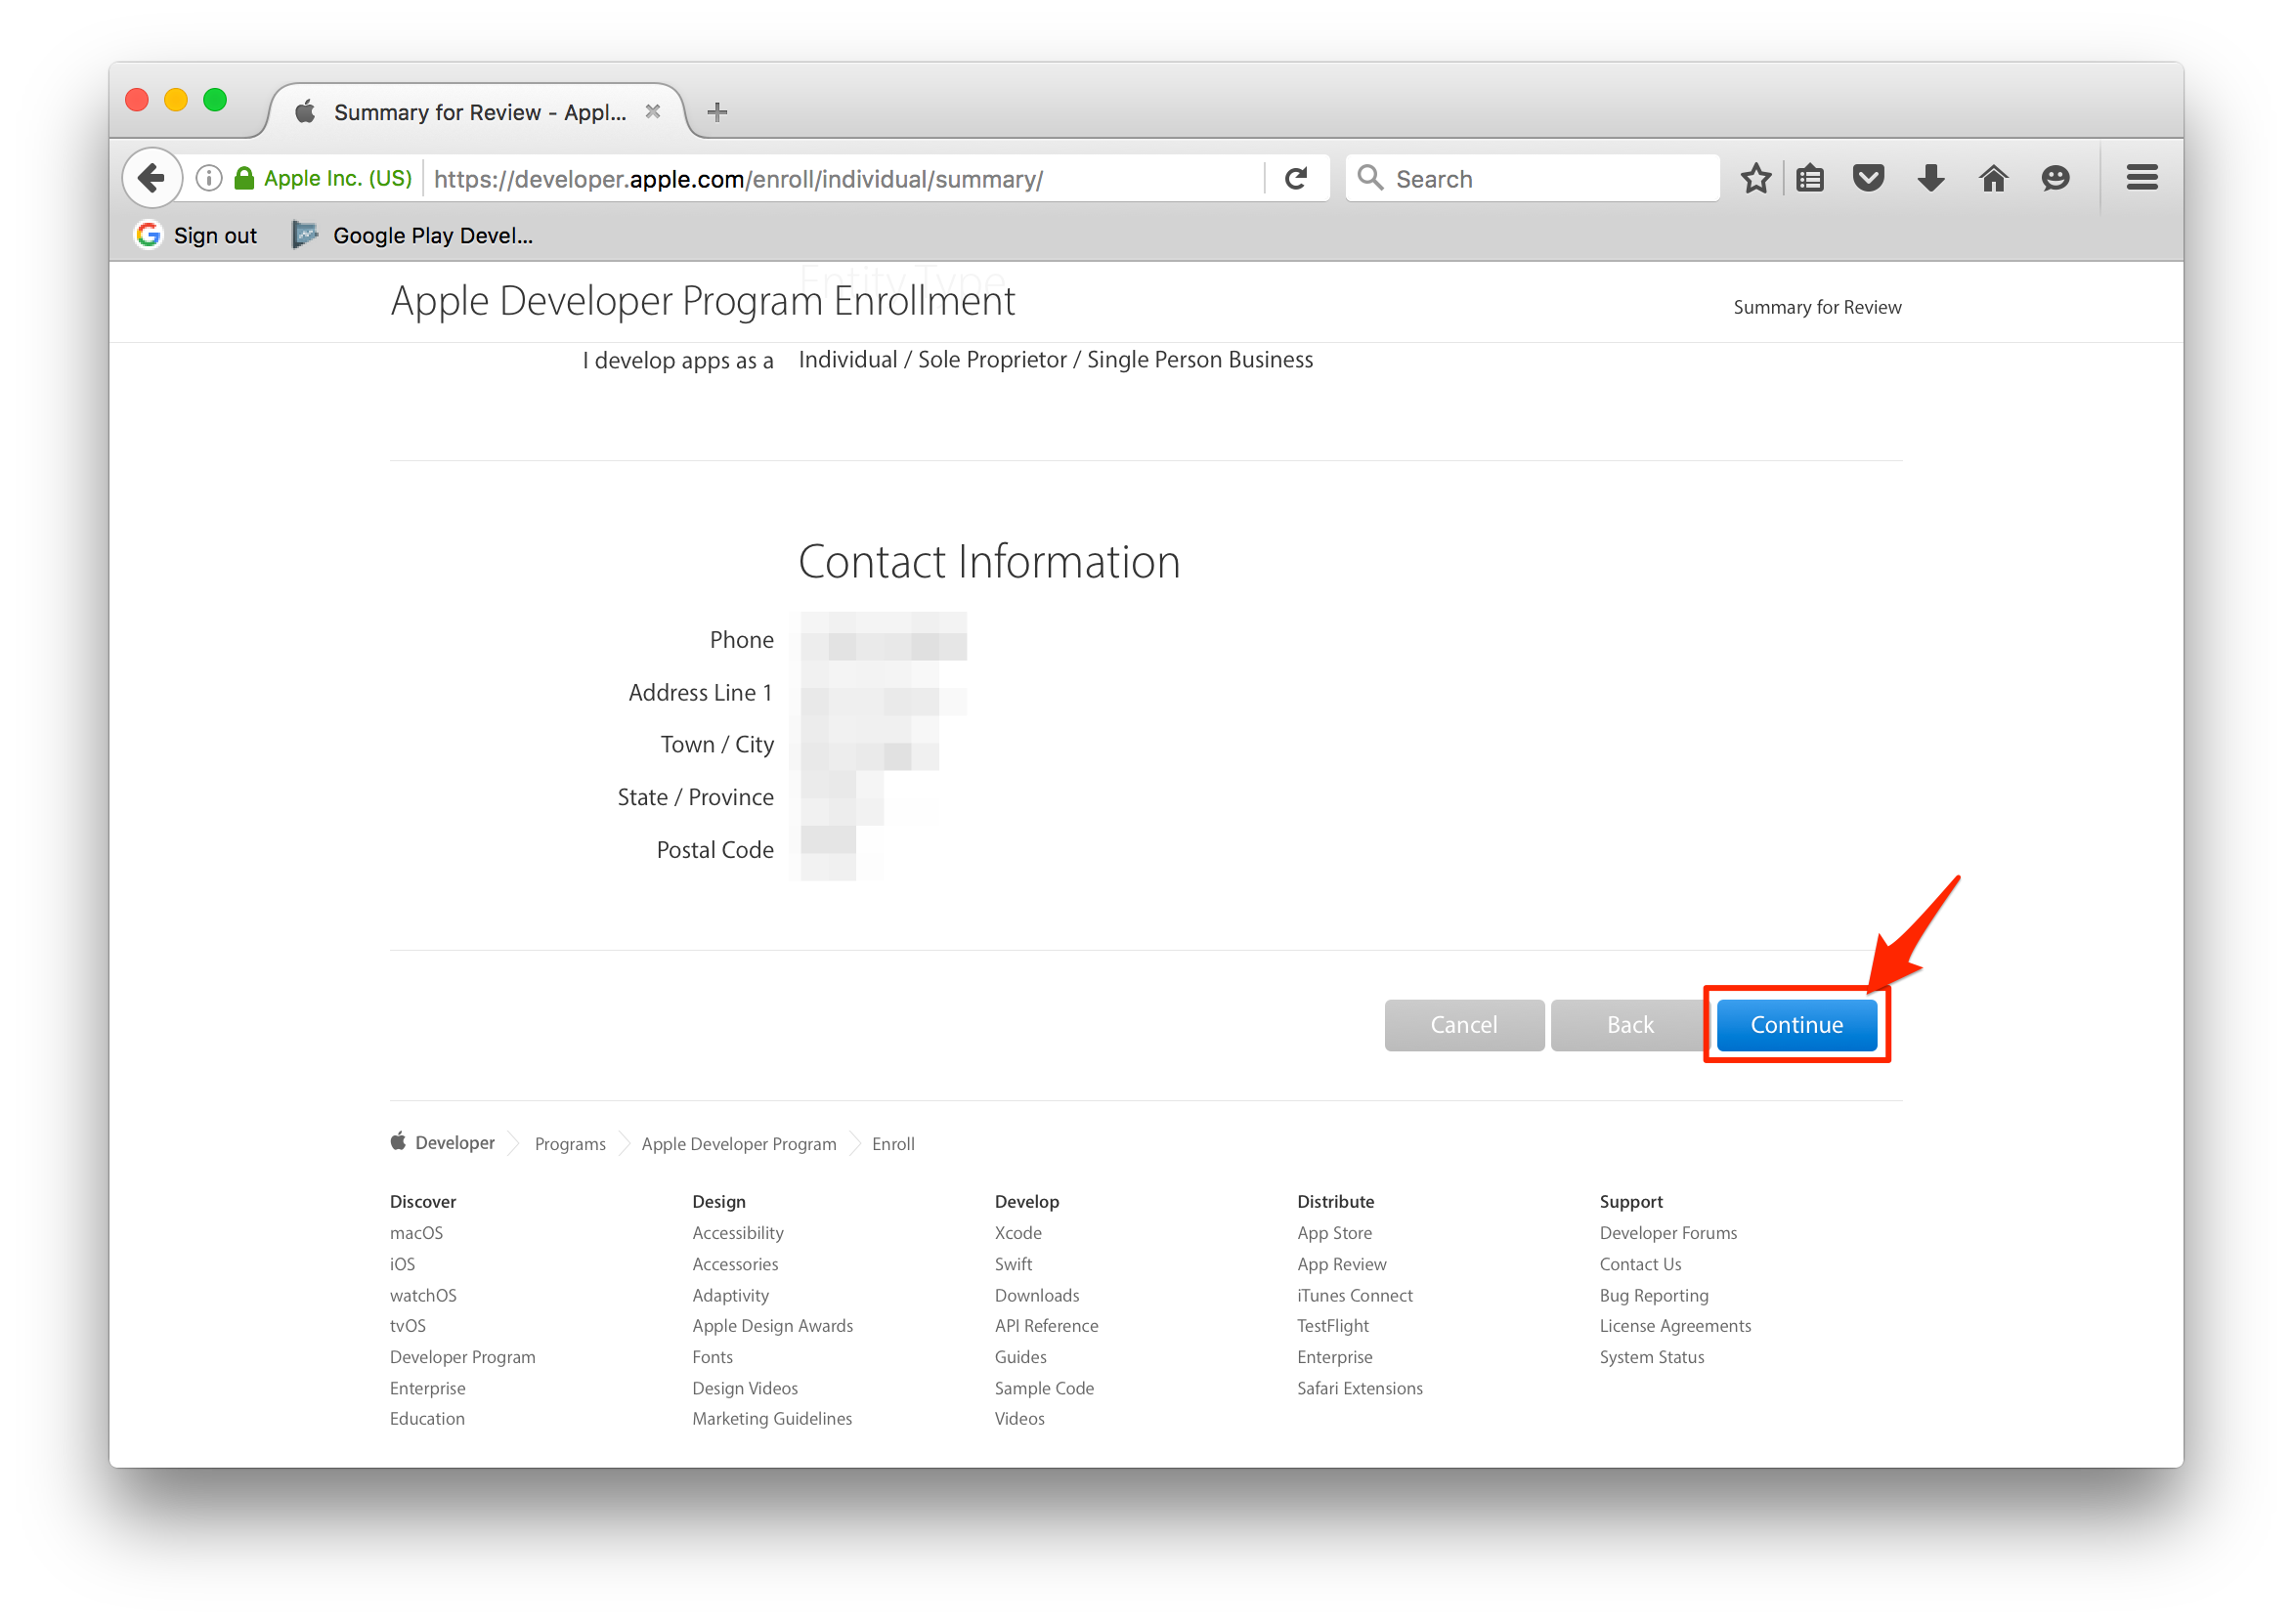
8. Confirm the Apple ID Information, Entity Type, and Contact Information and hit ‘Continue’
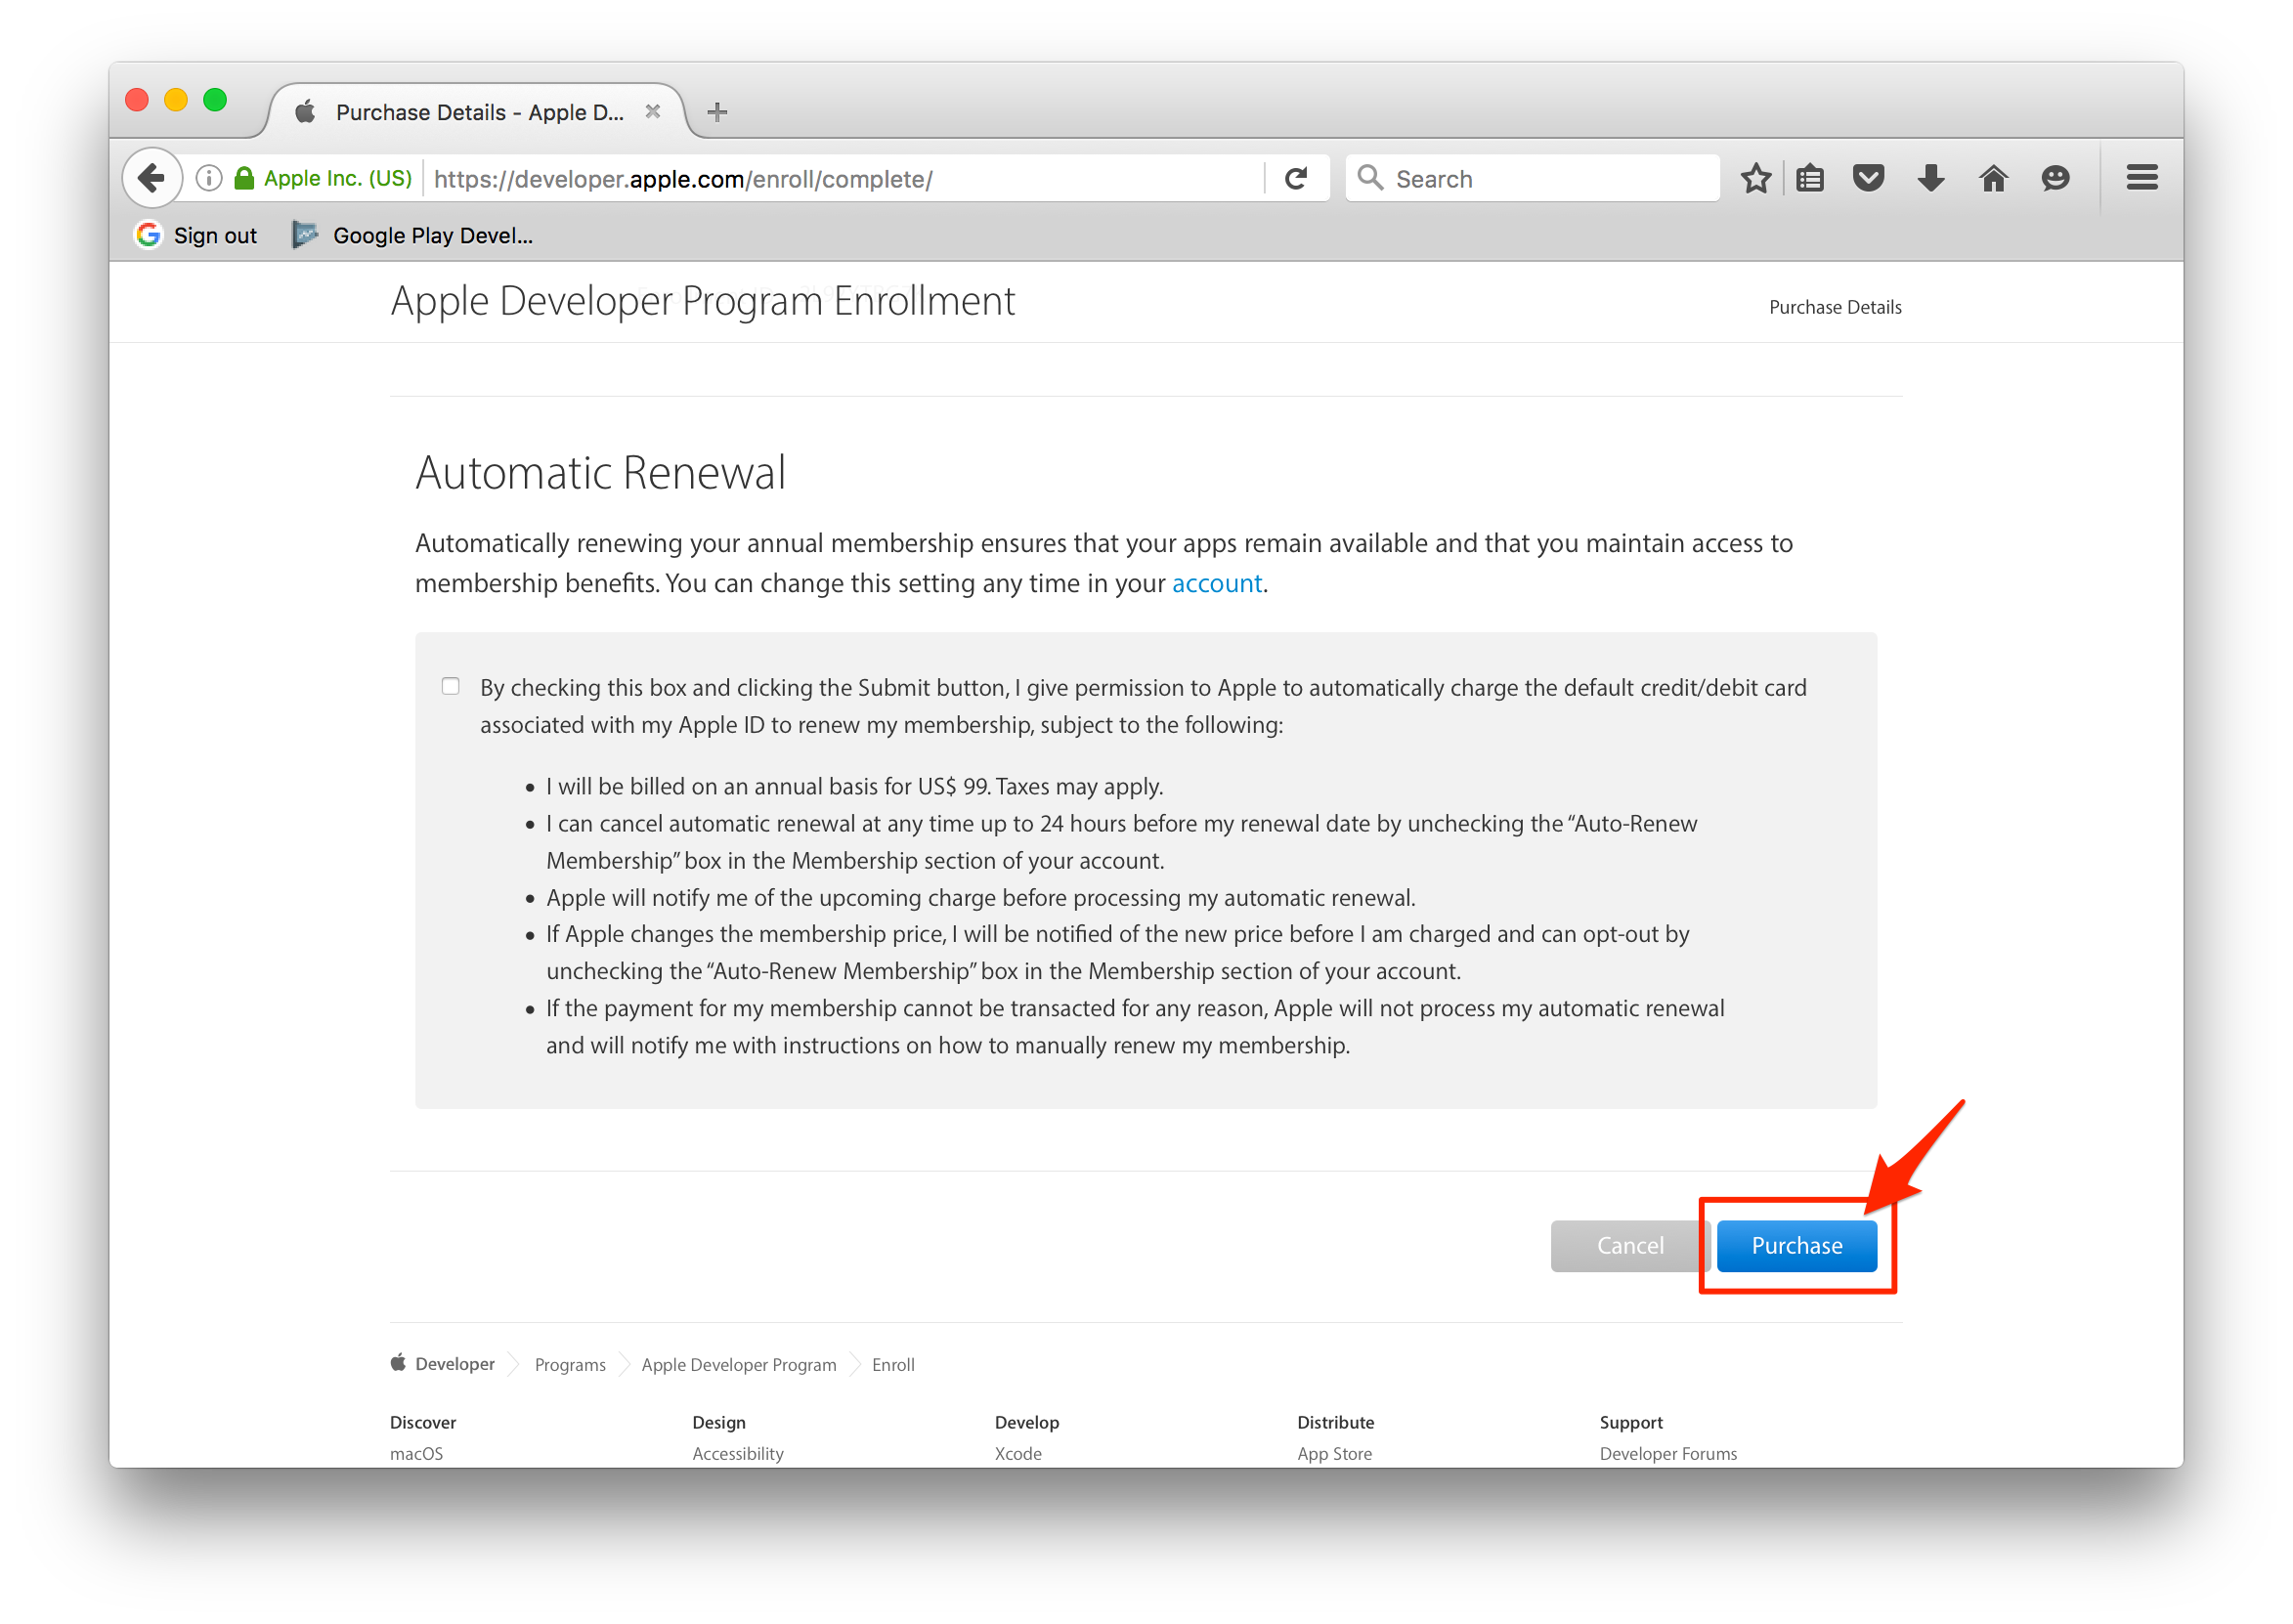
9. If you would like automatic renewals select the auto-renewal box (this is option and not required), then click ‘Purchase’ to enroll and pay for your yearly iOS Developer Account
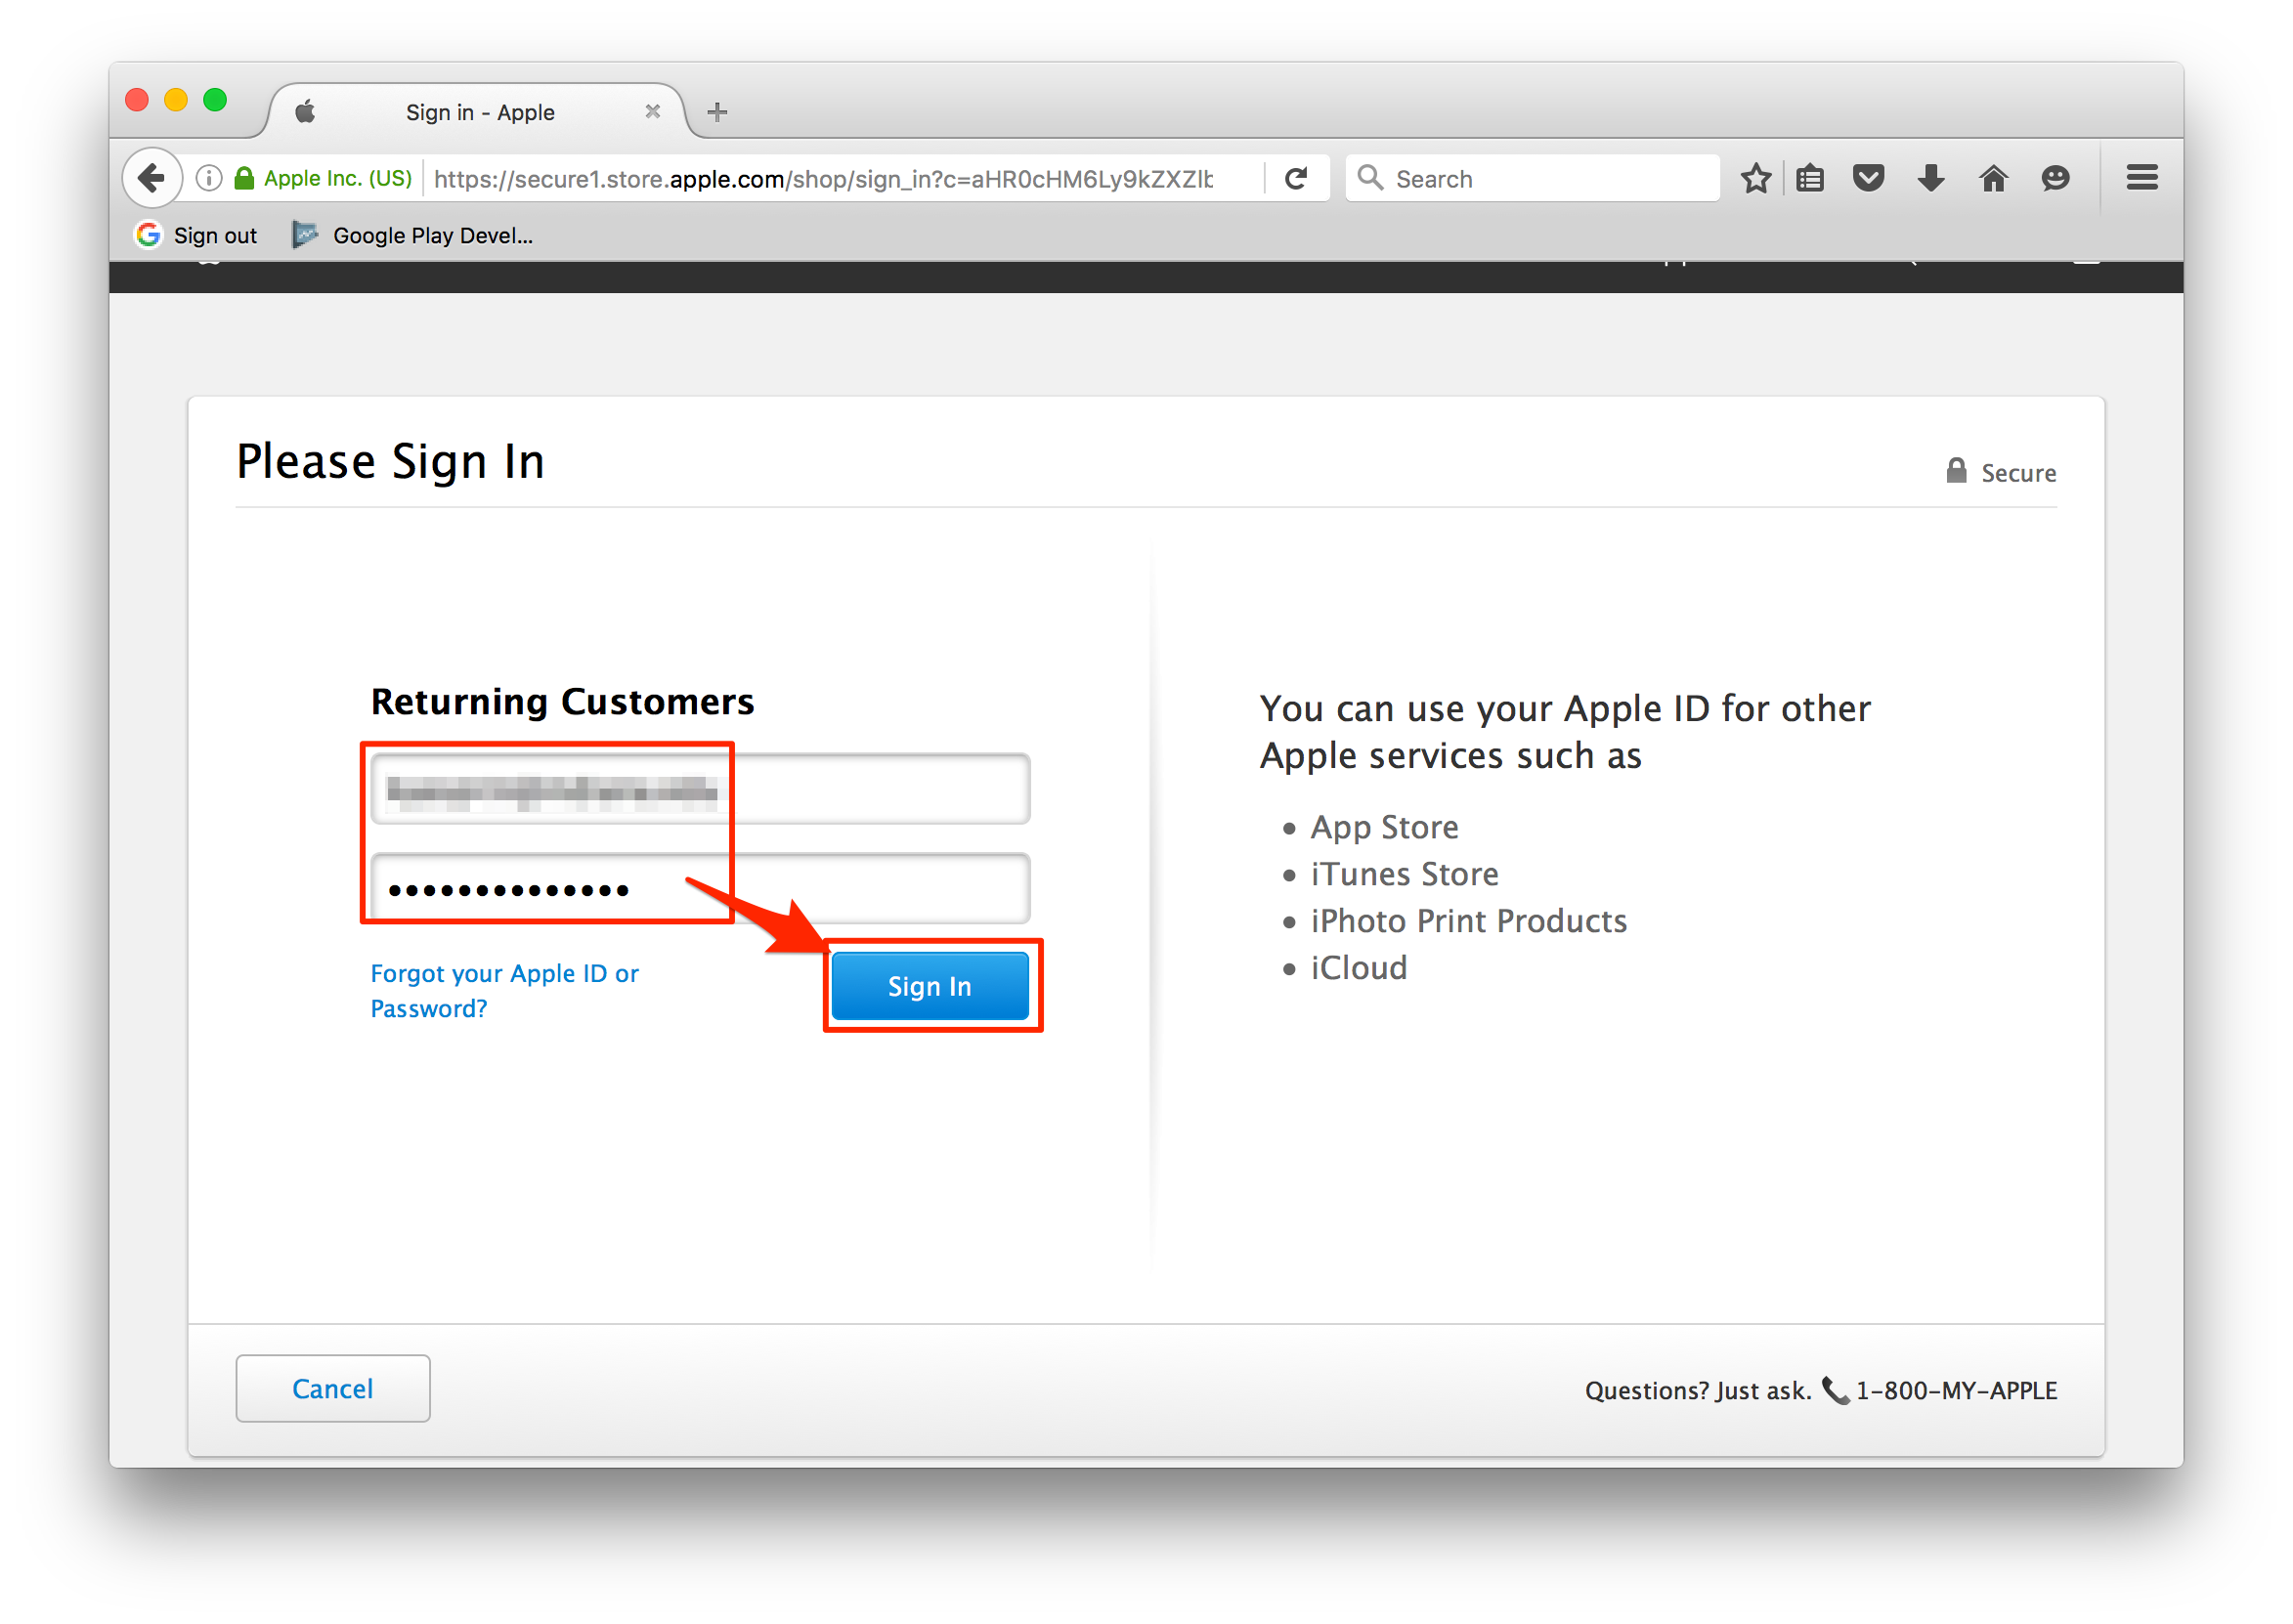
10. Sign in with your Apple ID/password
11. Fill in the billing information and press ‘Continue’ to complete the payment and setup of your yearly iOS Developer Account!
12. Fill in any remaining information on the following screens. Apple will send a confirmation email within 24 hours notifying you that your iOS Developer Account was successfully created!
As per what we had done, it normally takes 2-3 weeks , but DNB says 5 Business Days. Once you get this number go back to Apple Developer Portal to complete registration.


No comments:
Post a Comment